

Easy Options to make Puppet Arms, Hands, and Arm Rods
When I started making hand-and-rod puppets, I was confused by all the different options for filling arms, hands, and attaching arm-rods. Different makers have different methods and everybody swears theirs is the best.
I’ve tried many methods and I’m here to report which methods work best for the Ballyhoo Creations puppet patterns as well as methods you can try for other puppet patterns too.
Everything is included in the video below, or you can read on to get the same info in this written article.
Puppet Arm Rods

Let’s start with arm rods – this is what moves the puppet’s hand so they can gesture and brings a puppet to life. I’ll go from left to right in the above photo.
1. Purchased external arm rods
- You just slip them over the wrist. They’re easy – they’re not too expensive – but they don’t give the greatest hand control.
- Amazon external rods: https://amzn.to/3TTkxZx
2. Wired Hand attached to Rod
- This internal rod system has the arm rod attached to wire or plastic that will go in the puppet’s fingers.
- There are different methods for wiring and attaching puppet hands.
- These take more time to make, but you can pose the fingers and make great hand gestures with puppets using this type of arm rod. (more info below in the hand section.)
3. Internal Puppet Arm Rods
- You can buy or make a rod that is attached inside the puppet wrist or hand. The internal rod can be attached to the hand assembly like the example above, OR glued/sewn into the puppet wrist.
- Professional puppeteers use internal metal arm rods because it gives great control.
- You can make your own using insulation supports or welding rods. The handle can be made from a dowel rod. Pro rods are typically painted black or covered in black shrink tubing so they don’t reflect the lights on stage or film sets. Watch the Puppet Nerd Video for a DIY version: https://www.youtube.com/watch?v=vDwUYtGJopE
- Check Etsy.com for people selling their handmade puppet arm rods.
4. Plastic detachable puppet arm rod
- I devised these as an inexpensive way to create arm rods at home using tools most crafters already have.
- These plastic rods are safer for children and can be detached so you can wash your puppet.
- These are made using balloon sticks from Dollar Tree. Watch the video starting at 01:44 to see how easy these are to make.
- This is my favorite method because it’s cheap and easy- plus it gives decent hand control. They are not stiff enough to give full control for a professional puppeteer. But this method is perfect for puppets that will be used by kids. Plus they are super cheap! You can make a dozen of these for a couple of dollars plus some hot glue and scissors.
5. External Puppet Arm Rod with Rubber Band
- use any of the materials listed below with a rubber band to attach the puppet wrist to the rod.
- Learn how to attach the rubber band to the rod by watching the video above starting at 06:27. It’s very easy!
- Rubber bands and rods can be easily sourced. But the bands don’t give the best hand control and will break over time.
Materials for puppet arm rods
Most of my examples show a thin metal rod but you can make puppet arm rods out of many different materials:
- thin wooden dowel rods
- insulation supports
- welding rods
- lucite rods
- plastic balloon sticks as shown above
- metal tubing from the hardware or craft store (in the hobby aisle)
- straighten a coat hanger
Filling Puppet Arms
There are many ways to fill fabric puppet arms and make them move or stay stationary. You can try any of these methods or combine them.
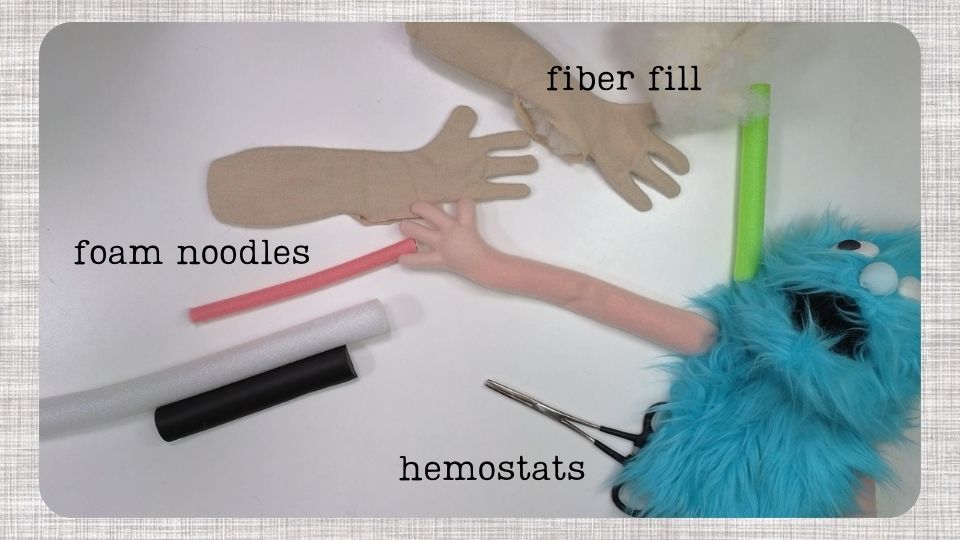
- Fiber Fill – stuff the arms as if they were a stuffed animal. You can leave a gap where there is no filler at the elbow and wrist so the puppet arm will bend at those “joints” when you work your puppet. Fiber fill is sold at fabric and craft stores. Polyfil is the easiest brand to find but not the best stuffing out there. Bags of fiberfill run $3 to $15, and can go higher if you’re using natural fibers like wool roving.
- Fabric scraps – this is a more sustainable filler since you probably have fleece or fur scraps leftover after you made you puppet. Results may be lumpy, but it avoids the need to buy a whole bag of fiber fill.
- Wooden Beads – you can string your own or buy strings of wooden beads at the craft or dollar tree stores. These are heavy, so the puppet arms move like frantic spaghetti. This is a fun method to try, but be aware the lumps may show through thinner puppet “skin” like thin fleece.
- Foam noodles – this is my favorite. I use the foam hair rollers from dollar tree but you can use other types of foam rods like the stuff made for cosplay. Cut the foam to fit the upper arm and lower arm, leaving a break at the elbow where the arm will bend.
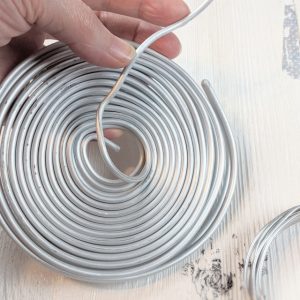
- Wire – You can use the wire inside the foam hair roller, or use aluminum armature wire inside your puppet arm(s). I like to put an arm rod on one hand, and wire the opposite arm so it will pose and not be used with an arm rod.
Puppet Hand Options

Don’t forget the puppet’s hands! Try one or more of these methods to fill out your puppet’s hand and fingers:
- NO FILLER – Most fleece is thick enough that small fingers don’t require filler. Quick and easy!
- FIBER FILL – Use the fiber stuffing and fill each finger. Hemostats make stuffing small areas SO much easier. Just get a pair. You’ll thank me later. My favorite pair is less than $5 in the Walmart fishing aisle.
- WIRED FINGERS – I prefer twisted aluminum armature wire with a loop at the fingertips so it won’t poke through. It’s better for posing and it’s washable because aluminum won’t rust. I generally don’t add stuffing when I wire the fingers. This method allows you to pose and gesture with the hands.
- FOAM OVER STEEL WIRE – take a look at Pinterest to see how this looks: https://www.pinterest.com/pin/6192518228926552/) Many pro puppet makers use this method. The Ballyhoo hand patterns are too small to use this method unless you want to deal with very fussy small bits of foam. So I don’t recommend this method for my patterns. Also, steel wire will rust if it gets wet. If you want to see a pro in action – watch Adam Kruetingers make hands over at Puppet Nerd. https://www.youtube.com/watch?v=unF7z4pshFo
- OTHER OPTIONS – needle felted hands, foam clay hands, child’s mittens or gloves in case you don’t want to sew little hands. Just make sure the hands are lightweight so you can easily move it with a rod.
That’s my entire brain dump on Puppet Arms, Hands, and Arm Rods. Hopefully that helps you decide how to build YOUR puppet.
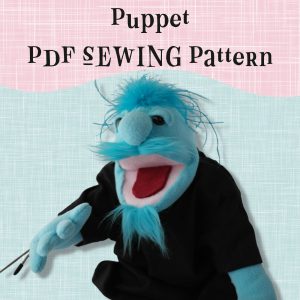
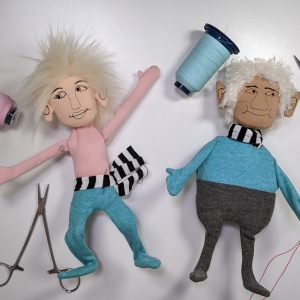
If you’re looking for an easy pattern to get started with puppet making, check out my puppet sewing patterns and designs for embroidery machines below. (In-the-hoop patterns are for embroidery machines, while PDF sewing patterns are for sewing machines or can also be hand-sewn.)
-

-
Product on saleYIB Puppet PDF Sewing PatternOriginal price was: $15.00.$10.00Current price is: $10.00.
-
Product on saleYab Hand-and-rod Puppet pattern, made in-the-hoopOriginal price was: $15.00.$10.00Current price is: $10.00.


