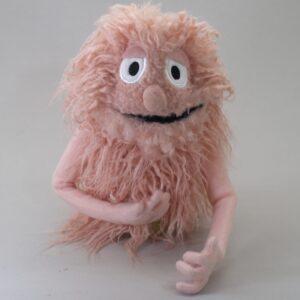
Make your own adorable furry puppet with my new Beasly Puppet materials kit. OR use your own fur and fleece to make something similar using my Beasley Puppet Pattern. Lots of tips, tricks, and ideas for any puppet maker are shared in the video tutorial.
Puppet-making can be done by anybody! The Beasly is a hand-and-rod puppet made for beginner to intermediate puppet makers, and there is NO FOAM so it goes together FAST. You will need to have a good understanding of your sewing machine for this thick fur and fleece, or you can hand-sew the seams if that’s more your jam.
The video refers to using one of my puppet kits but the process is exactly that same if you’re using your own materials. The Sewing pattern gives you all the details on choosing material for your puppet.
Parts of the video tutorial show a fleece puppet being made so you can get a better view of the seams and cutting. Fur is a bit harder to work with, so take your time with it. It’s worth it!
Recommended stitch lengths referred to in the video are 2.5mm for head/body, brain. 2.0mm for mouth and arms, and shorten it to 1.5mm when stitching the fingers.
Video Chapters
- 00:00 Getting Started
- 02:18 Pattern Tracing
- 03:25 Sewing Puppet parts
- 05:02 Cutting
- 06:13 Turning your puppet
- 09:20 Assemble Puppet Pocket Mouth
- 11:07 Attach the Mouth
- 12:52 Attach Puppet Eyes (see below for fabric ball eyes)
- 14:54 Eyelids, Nose and Pupils
- 21:13 Arms (more options down below)
Two additional sets of instructions for eyes and brain
These items were added AFTER the video and will help you understand the fabric eyes and the brain pillow better.
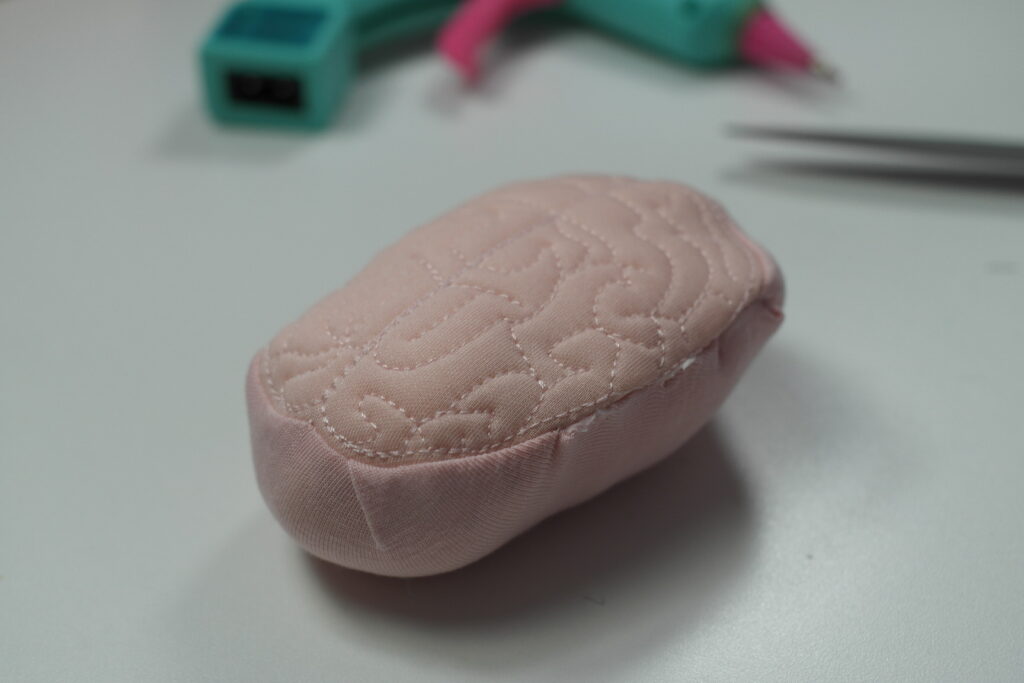
Where does the brain Go?
When I said it like that, you probably figured it out. The brain pillow goes into the puppet’s head to hold its shape.
- Stuff the brain as lightly or as full as you like.
- The stretch fabric should bubble up. Dry fit the pillow into the head until you get a head shape that you like. The non-stretch fabric should fit on your hand.
- Then close up the pillow (glue or hand stitches) and place it in the head.
- The brain tends to get stitched into place when you stitch the nose and eyes on. If you are glueing the nose and eyes, you can either glue the brain inside the head or leave it loose (either way, it’s machine washable).
How to make fabric-covered eye balls
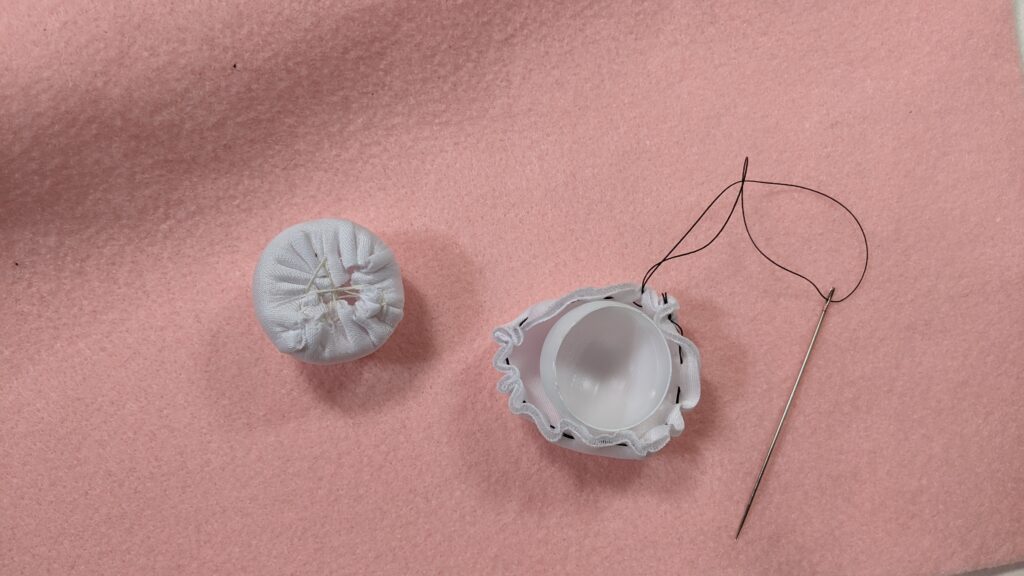
To make the fabric-covered eyeballs seen on the sample puppet above…
- Choose a round, rigid object like a ball, button, sponge, etc. You can cut a part off of the ball if you want a flatter back. I love the monster eyes that Dollar Tree sells around Halloween for this, but the technique works for anything with rounded edges.
- Cut a circle from stretch fabric that will wrap around to the back of the round object. Scuba neoprene is great because it conceals the object and has a smooth, shiney look.
- Use long running stitches around the edge of the fabric to gather the fabric into a cup shape.
- Put your round object into the fabric cup and pull the threads to tighten it around the object, then stitch it to secure and tie a knot in the back.
- Use a ladder stitch to attach the fabric-covered eye to your puppet. This will hold the eye securely and look more upscale than plastic. Glue felt circles or other pupil onto the fabric.
- Here’s a short video so all of that makes sense! https://youtube.com/shorts/qIfmuCnluJg
new to dollmaking?
Free Video Series
Learn the skills for making dolls, plushies, and puppets in my free video series.